Pages

Monday, 24 December 2012

Season's Greetings

Season's greetings from soggy Shropshire!


Had a brief window of sunshine yesterday so went to see how the woodland and wetland were doing.


Well. that's a couple of meters deeper than usual!

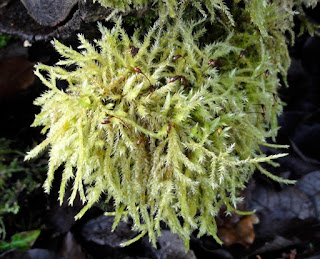
There is some interesting growth in the woodland on dead wood.


Sunshine highlighted the interesting colours and detail.
Back to very soggy today.


Saturday, 1 December 2012

Genuine antique stool?

My first school woodwork project was this 16 joint stool with a seagrass top. This was in 1962 which makes it a genuine antique at 50 years old!

 Amazingly, the underside still shows the original red and green of the seagrass.

Christmas Show and Sale


Friday, 16 November 2012

Coloured Wood

No, I haven't had the paint out recently! These are natural colours created by time. This bent branch spoon is damson from a branch I found which had been cut off last year. The wood was fairly dry and hard as hell to work. The pink is a layer just under the bark so I left it on to show the natural curve of the bowl rim.

This next one is in Hawthorn which is carved green and left for the sap to stain the surface to a lovely golden brown.
Spalting works well with some woods and this Aspen scoup shows very marked colouring after being left in the log for 9 months.

We had a 60 foot Silver Birch blow over in the early summer. The base was rotten and had sent a brown streak up the trunk a short way. There was only enough of this colour that was sound enough to make a few spoons. Easily confused with Walnut at first glance!

Nearly all my work this year has been with 'firewood'. I keep interesting bits to one side for carving. Last week the carving pile was bigger than the firewood pile! Think I need to be more selective otherwise we'll be relying on heat generated by carving and not burning. That's OK for keeping warm but won't get the dinner cooked! There is a lot of spalted Birch which has reached its peak so I am roughing out as many bowls as I can.

Wednesday, 12 September 2012

Still Buzzing!

A few weeks have now passed since Spoonfest and I'm still buzzing with ideas inspired by the great people I met there. A few new spoons have been added to the gallery page, with lots more developing but not enough hours in the day and too many other pressing projects getting in the way. Cycle trips to the States and Sweden are formulating in my mind, purely for research of course, no hint of a holiday at all! Need to set about selling more spoons and bowls to pay for them.
Had a little play with colouring and now most of the stock of pixie spoons are sporting a new look.
Had Fred Livesay from Minnesota come and stay for a few days after Spoonfest, and he explored some of the wood that has been lying around for a few months/years. I was surprised to see how much it had changed from when used fresh, and that a lot was still split free and workable. Some of the 'dry' firewood has been converted to spoons already with lots more being kept to one side just in case I get more time to experiment.


Tuesday, 21 August 2012

Spoonfest

I was there, and I've got the t shirt!
This had to be the best value festival ever. For the same price you would pay on a local campsite there was everything a spoon carving enthusiast could possibly want:- free wood, chopping blocks, inspirational teachers from around the world, food, local beer (after tools down of course), and the friendly company of nearly 200 other spooners. The atmosphere was great and inclusive so even people coming on their own felt involved. Skill sharing was rife and everyone from complete beginners to seasoned pro's had a fantastic time and the friendly atmosphere was infectious.
It's a big step from having a mad idea to actually pulling it off so a big thank you to Robin and barn for doing it and all the volunteers and people of Edale who helped to make it happen.
I arrived on Thursday to help get the party started and make sure the beer was well tested but also to attend the first workshop with Jogge Sundqvist  on the Friday morning. He was booked to do the opening lecture in the evening but added two workshops as well.
Sorry about the exposure, I wasn't paying attention and the camera was on the wrong setting!
Jogge's lecture was outstanding and worth the visit in its own right.
His spoons show particular attention to detail with a lovely finish. I dug deep into my pocket and bought the green and black one above to constantly inspire me! I also bought one of Jarrod StoneDahl's spoons which is a beautiful shape and a typical example of his work.

Fortunately, some of my spoons sold in the spoon shop (below) so I managed to make a small 'profit' over my purchases.
The workshops were very popular and quickly filled up. The demand was so great on the first day that extra ones were put on. This helped by doubling the places available but meant that the tutors missed out on ones that they would have liked to participate in as they were too busy teaching. Fritiof said that he was so tired in the last session that he ran out of English words!
After tea on Saturday night there was campfire singing into the early hours well away from the campsite.

Sunday morning saw another set of workshops organised ........

.... but people were better organised for queueing than before ....
..... with impromptu entertainment.
The last hour or so on Sunday saw a special collaborative event which was enjoyed by everyone. Sean Hellman took photos so I won't say anymore as I expect they will appear on another blog soon.
If you didn't attend this event make sure you look out for the next one and register as soon as possible.
Thanks again to all involved for a memorable event.

Monday, 18 June 2012

Fordhall Summer Fair

I shall be demonstrating next Sunday 24th June at Fordhall Farm summer fair. This is a special place and my association with it goes back 25 years. For people who do not know about it you can find out why on their website.
Yesterday I made a small tarp/shelter which will have enough space to work but not too large a footprint. The design seemed OK on paper but I'm glad no one was around to watch me trying to put it up on my own! Wobbly didn't come into it! Finally worked out after a strong coffee that the first upright needs to be secured with three guys so that it stands firm and everything else can be attached to it. The third guy can be removed when the whole structure is together. Of course, someone holding it would work, but I can't rely on that most times so had to be able to do it on my own. If it doesn't fall down this week I'll post a picture of it at the show.
This is a charity event which I want to support so I'm not charging anything. Hopefully there will be some publicity and the chance to sell a few items. The Pixie spoon will be a good one to make on the day as it is quick to carve.
I'll have some 'Blue Peter' ones in a basket for anyone who can't wait for one to be finished. I hadn't carved any spoons for three weeks and the first one made today was rubbish. Years ago my dad told me not to employ a plasterer who had just got back from holiday as it takes a few days for them to get their hand in. I suppose it's like any skill and needs regular practice to keep it up to scratch.


Tuesday, 12 June 2012

Pixie Spoons

Most people would know these as Gypsy spoons. When my 4 year old grandson was helping me get the shelter ready for the last spoon carving course he found a pointed stick and asked what it was for. It was left over from making some Gypsy flowers so I made him one. He gave it to his mum and said it was a pixie flower. I don't know if he miss-heard me or liked the name better but the name stuck and the spoons have bowls shaped like a pixie ear!
They are made quickly using Aspen which is a fairly soft wood and left as cut without any fine finishing. This gives a different aesthetic to the finer hard wood style used in Scandinavian carving yet still makes a practical spoon.
The right hand one was made without using an axe. I'm trying to reduce weight when traveling by bike so used a survival knife and lump of wood to cut across the grain for the shoulder, then split from the end of the handle. Worked well but needs working on the technique as you need three hands!


Tuesday, 22 May 2012

Spoons, spoons, spoons

Weekend of spooning went well with some new ideas developing. Great to see barn again and watch the master at work!

It is always amazing how much variety can be achieved with what is locally available. All of the wood used came from within 20 yards of the shelter and would have been used for firewood if not made into spoons. We used birch, sycamore, hawthorn and aspen with a range of abilities from beginner to advanced. It's lovely to see someone with their first ever spoon!


Monday, 14 May 2012

Spoon Club


There is one place left on the spoon carving course with barn this Saturday due to a cancellation. If you are interested contact me straight away at eco.al.
Barn has agreed to stay over for a spoon club here on Sunday 20th May in the afternoon from 2pm. This is very informal with chat and tea around the fire or under cover if wet. Bring your own tools and ideas and see what others are doing too. No formal teaching but good to get inspiration from and to help others. No charge but you are welcome to bring something to cook for tea. I hope this will be a regular monthly 'club' for those interested in spoon carving etc. Not suitable for complete beginners but all other abilities welcome.  Chopping blocks provided! 
Location is TF4 3QX, number 5, GR SJ680056, car parking just past house on left. Contact no. is 07779 967710.
I will post pictures of the weekend activities soon.


Tuesday, 10 April 2012

SpoonsandBowls.co.uk

My new e-shop is up and running at last! It is available here and links to this blog where up-to-date information will be posted. I've also added a gallery page - see tab above - and will use this to show recent work in higher definition.
Like all new projects it always seem to take much longer than planned. With developing the website and making stock for it, I have had little time for other things. It is now only 5 weeks to the spoon carving courses here with 'barn the spoon', so I need to get on with promoting it as there are still some places to fill.
If you look at his blog site here, there is a link to the amusing article about him in the Guardian fashion section! He is a very talented spoon carver/designer and really good teacher so his courses are not to be missed no matter how skilled (or not) you are. Anyone from complete beginners to experienced carvers will benefit from his knowledge.
You can book on the website here and go to 'products' then 'courses'. Payment is by paypal account or credit/debit card. The prices are at last year's rates which makes them a real bargain.

Monday, 19 March 2012

Bent Branch Spoons

Three very different spoons all making use of the natural bend where a branch joins the main stem. They are all finished with cold-pressed raw linseed oil which seems to dry quicker than walnut oil.

The first one is in Hawthorn. This was made using very fresh wood, then left for the sap to stain it before drying and oiling. Length 18cm with a round  bowl suitable for soup or as a small serving spoon.


The second is made from Sycamore growing wild in an old cemetery. 17.5cm long.

And this ladle in Aspen is from a very bent branch. The grain follows the handle and bowl giving it greater strength. It is 39cm long with a large bowl.
I find these bent branch spoons a pleasant diversion. When the wood crops up I just have to try it to see if a spoon develops. Sometimes they don't work but when they do, often turn out quite differently to how you first imagine they will look. This week I'm supposed to be making bowls, which I am, but was distracted by another bent branch so had to stop and try it out. Think it's going to be a pickle or olive spoon for a deep jar! Anyway, it's good to give the muscles a rest from bowl carving.

Friday, 9 March 2012

Aspen Serving Spoons

I'm becoming a bit of a fan of Aspen, which is great as I have enough to keep me going for years. It is straight grained and fairly easy to work and has very little taste so it's good for cooking spoons and bowls which come into contact with wet foods such as bread dough. Some pieces have a lovely ripple like fiddle back sycamore and I have been making some serving spoons from these.
They have been finished in walnut oil which works well but may be a problem with some people with nut allergies. Raw linseed oil is OK in that respect, but most that is available in the UK is pressed at a high temperature and isn't fresh so it has a strong smell and taste which many people find off-putting. I've just taken delivery of some UK grown linseed oil which is cold pressed on the farm and is only a few days old. This is culinary grade and more expensive than most virgin olive oils and has to be kept in the fridge. It does have a nice taste and virtually no smell and can be used in salad dressings etc. It's going on the next batch of spoons and bowls so I hope it works!

Sunday, 26 February 2012

Lactic Fermentation

This has to be one of the simplest, and best, ways to preserve fresh garden vegetables. It doesn't involve cooking and it keeps and enhances the colour, flavour and texture of your surplus to enjoy in the less productive times of the year. You can use many different vegetables depending on what's available and the preparation is the same for all of them:-
Wash in cold water to remove soil etc, but leave the skin on as you are relying on the natural enzymes and bacteria to start the fermentation process. Use only home-grown or organic to avoid treatments which may prevent the process from starting.
Slice thinly with a sharp knife - get your friendly spoon carver to show you how to sharpen a knife properly!
Start with a couple of layers in a preserving jar with a little sea salt and pound gently with a wooden pestle to break down the cells to release the liquid.
Add more layers and salt as above and keep pounding/pressing the vegetables until the jar is full to the top and the liquid is covering it. This will take about 4 times the amount you think and is not a quick process. If you are short of time stop reading blogs and emails for a day and you will be able to fit it in easily!
The jar should now look like this:-
Put the open jar in a bowl to catch any liquid which will overflow. Put a jam jar full of water (for weight) on top as you need to keep pressure on the vegetables. A cloth over the top will keep it clean. Leave it in a warm room for a few days. Every time you pass it give the weighted jar a press and soon bubbles will start to rise as the fermentation begins:-


After about a week, depending on the temperature, the fermentation will have slowed down. Remove the jam jar, add any liquid from the bowl to cover the vegetables and seal the top and store in a cool, dark place ready for the time you have run out of fresh produce. This will also save you a bike ride to the shop. You will have a crisp and very tasty food which is quite different to pickle. Use it as a winter salad but do not heat it as this will damage the lactic ferment which is good for the digestion.

What vegetables to use? Well, white, red and green cabbage all work well, especially if combined in layers of different colours. This is how sauerkraut is made but a lot of commercially made ones are sterilised after filling the jars which destroys the ferment. I also use beans, beetroot, celery, peppers, chilli, carrots, root ginger (very fine threads and only a little) and spinach, but not onions as they dominate the flavour. Seaweed and wild foods can be added for variety and extra minerals. Use strongly flavoured things sparingly otherwise you will not be able to taste the other vegetables.

Kimchi is made this way too, but a lot of chilli is added to really spice things up! Use small preserving jars so you can experiment with different combinations. Leave the sealed jars for a few weeks, if you can wait that long, and once opened keep a liquid layer on top and store in a cool place until finished. If you leave it too long after opening a white mould develops so probably best to put it on the compost heap which will enjoy the extra bacteria, and use smaller jars next time.

Wednesday, 22 February 2012

Multi-purpose Spoon?

When I was on the survival course four of us grouped together to reduce the effort needed for fire making and cooking. I soon found out that my nifty folding titanium spoon, which is excellent for camping on my own, wouldn't hack it for larger quantities. A spoon had to be made quickly from the wood used for the fire. No problem, as I had an axe and a knife, so 5 minutes later a multi-purpose but very crude spoon was in use. It worked quite well for stirring, serving and also for eating, and I was impressed by the wood as it worked well, was very dense (despite being a 'softwood') and was even used for poking the fire!
The wood had grown slowly and was very heavy and still green, so, being a keen  carver, I brought some home to identify and make some spoons with. These have spatula shaped ends for cooking, but with sufficient bowl depth to use for serving too. Not quite the multi-purpose spoon as they are too big for eating with.
Turns out that the wood is Lawson's Cypress which I checked with my 1972 copy of Herbert Edlin's 'Wayside and Woodland Trees'. He mentions another variety of Cypress which was discovered near Welshpool by someone called Leyland. It was being widely propagated as it had potential for quick timber production. I wonder if anything came of it?!!!!!!
I only have 6 spoons made from it and probably won't come across any more for a long time.


Wednesday, 8 February 2012

View from bivvi

Dawn, Saturday, -7C, 6 hours before snow arrived.
Camera battery had frozen. I warmed it up in the sleeping bag but could still only take this one pic. I was on Cannock Chase on a woodland survival course. Why, you may be wondering and so was I! Last minute decision which seemed like a good idea at the time. Was quite snug in my bivvi with two sleeping bags but not looking forward to getting out in the biting wind to get the fire going and cook the porridge. The wind had swung from the north to a south westerly and the bright morning was already closing in with the threat of snow. The tarp was arranged to cover the campfire and keep the worst of the wind out. Bang on 1pm the snow arrived, very fine at first which blew into everything, then larger flakes to build up a thick coating by late evening. The temperature had risen a little but it felt colder with anything damp freezing quickly so it was a relief to get into the cold but dry sleeping bag. This really was a survival course! Sunday morning was dull but calmer and with virgin snow everywhere a doddle to spot all the wildlife tracks left overnight including a lone badger in a sett not 30 yards from the camp.
So, what's the point? Could I do it I suppose was one reason, but you learn a lot in these situations and some of the skills are transferable to everyday spoon carving life. I prefer to work 'on site' which for spoon and bowl carving means close to the source of the wood. The finished products are much lighter to carry than the wet logs and all the waste can be used to keep you warm with a small but efficient fire.